
A fiber internet connection can feel mysterious when it stops working. The cable is thin, the connectors are small, and the equipment often has only a few status lights to explain what is happening. It is tempting to unplug and reconnect everything repeatedly, but fiber components need more care than an ordinary charging cable. A quick check can sometimes reveal a loose connection or a simple mismatch. In other cases, the safest action is to stop and contact the service provider or a qualified technician.
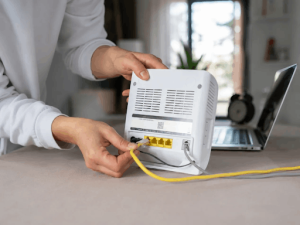
This guide is for home users, renters, small-office owners, and anyone who wants to understand the basics before touching a fiber connection. It does not replace installation instructions from the service provider or the manual for a specific device. It explains what can be checked safely, what should never be forced, and what information will help a technician solve the problem faster.
Start With the Symptoms, Not the Connector
Before handling any cable, look at the bigger picture. Is the internet service down on every device, or only on one computer? Has the optical network terminal, router, or media converter lost power? Did the problem begin after furniture was moved, a wall outlet was cleaned, or a cable was pulled? A clear timeline is more useful than a guess about the connector.
Check the power supply first. Then look at the device indicators and note their labels rather than relying on memory. If the provider has a service-status page or an outage message, review that before changing the physical connection. A neighborhood outage, account issue, or equipment fault cannot be fixed by reconnecting the fiber patch lead.
Make Sure the Connector Is Meant to Mate
Fiber connectors are not universal plugs. They differ in shape, size, locking method, fiber arrangement, and end-face treatment. A connector that looks almost right may still be incompatible with the port or adapter. Never push a connector into a port if it does not align smoothly and lock with normal, gentle pressure.
For a basic visual overview, it can help to recognize common fiber optic connector types such as SC, LC, FC, ST, and MPO. At home, the interface installed by the service provider is often chosen to match the network equipment. That means the safest replacement is usually the same connector type and polish specified by the provider, not simply the connector that is easiest to find online.
If a connector will not fit, stop. Check the label on the cable, the marking near the device port, and the original installation notes. Do not trim plastic parts, rotate a connector that is not designed to rotate, or use an improvised adapter to make two interfaces meet. These actions can damage a port or create a fault that is harder to diagnose.
Learn What the Labels Are Telling You
Small labels can contain important information. They may identify a connector family, fiber type, polish, cable length, or supplier part number. Color can sometimes provide a clue, but color alone is not a complete specification because conventions vary by product and network.
One detail to take seriously is the polish description. UPC and APC connectors have different end-face geometries and are intended for different mating conditions. A user should follow the port and cable labels supplied for that installation. If the labels do not match, or if one end appears to be a different style, do not assume that it will work after extra force. Take a clear photo and ask the provider or installer to confirm the required assembly.
Check the Cable Route Before You Touch the End Face
Many home fiber problems are not at the connector itself. Look along the visible cable route for a sharply bent section, a cable trapped under furniture, a door repeatedly closing on the cable, or a loose connection at the wall outlet. Fiber patch leads should be routed with gentle curves and protected from crushing. If the cable jacket is visibly damaged, do not try to repair it with tape or a household connector. Contact the provider or installer.
Avoid pulling the cable by its fiber or jacket. When the installation instructions allow a user to reconnect an assembly, hold the connector body rather than tugging the cable. Replace protective caps immediately if a connector must be disconnected and the approved cap is available. The goal is to keep the end face protected from dust, fingerprints, and accidental contact.
Cleaning Is Important, but It Is Not a DIY Experiment
Dust and contamination can interfere with a fiber connection, which is why professional installers use appropriate inspection and cleaning tools. However, a home user should not wipe an optical end face with a shirt, tissue, cotton swab, or household cleaning liquid. Those materials can leave fibers, residue, or scratches. Looking directly into an active fiber port is also unsafe because optical light may not be visible.
If the service provider has given you an approved, user-serviceable cleaning procedure, follow it exactly. Otherwise, leave optical cleaning and inspection to a qualified technician. In a support request, it is helpful to say whether the connector was exposed, disconnected, or accidentally touched. Honest details are more useful than an attempted repair that hides the original condition.
Do Not Confuse a Network Problem With a Wi-Fi Problem
Sometimes the fiber link is healthy but the local wireless network is not. If one device is slow while others work, restart the affected device and check its Wi-Fi signal before moving any fiber cables. If the router’s wired management page still shows an active internet connection, the problem may be Wi-Fi coverage, a password change, or a device setting rather than the optical link.
Separating these possibilities saves time. Keep a simple note of which device lights are on, whether wired devices work, whether Wi-Fi works near the router, and whether the provider has reported an outage.
A Safe Five-Minute Troubleshooting Routine
When a connection stops working, follow this order:
- Check power to the optical terminal, router, and any media converter.
- Note status lights and any error message before restarting equipment.
- Confirm whether the issue affects every device or only Wi-Fi or one computer.
- Inspect the visible cable route for crushing, sharp bends, or a connector that has clearly come loose.
- Match connector and port labels; reconnect only if the provider’s instructions say it is user-serviceable and the connection fits normally.
If those checks do not restore service, contact support. Share photos of labels and ports, the timing of the issue, equipment-light status, and any changes made near the cable. Do not repeatedly reseat connectors or attempt to polish, splice, or modify a cable at home.
Knowing When to Stop Is Part of Good Fiber Care
Fiber connections are designed to deliver reliable service, but their optical interfaces are precision parts. The best user action is often simple: protect the cable, confirm the labels, avoid force, and provide clear information when asking for help. With those habits, home users can rule out common issues without creating a new one – and technicians can focus on the fault that actually needs repair.